How to Remove a Tonneau Cover
Key Takeaways
- Most tonneau covers can be removed in 15-30 minutes with basic hand tools like a socket wrench and Allen keys.
- Soft roll-up and tri-fold covers are the easiest to remove — many require no tools at all and simply clamp off the bed rails.
- Hard folding and one-piece covers are heavier (40-80 lbs) and require a second person to lift safely without scratching your truck.
- Always label and bag your hardware (clamps, bolts, rails) so reinstallation goes smoothly when you need the cover back on.
- Leaving the mounting rails installed is fine if you plan to reinstall soon — just cap any open bolt holes to prevent rust.
Tools and Materials You'll Need
Before you start unbolting anything, gather your tools. The exact kit depends on your cover type, but most removals require only basic hand tools you probably already own.
- Socket wrench set: 10mm, 13mm, and 15mm sockets cover most clamp bolts
- Allen key set: some covers use hex bolts — 4mm and 5mm are the most common sizes
- Phillips and flathead screwdrivers: for securing screws on certain rail systems
- Painter's tape and a marker: for labeling clamp positions on the bed rail
- Zip-lock bags: to organize and store bolts, clamps, and small hardware
- Soft blanket or moving pad: to protect the cover and truck bed from scratches during removal
- A second person: essential for hard one-piece and retractable covers that weigh 40 lbs or more
If your cover uses no-drill clamp mounts — which most modern covers do — you won't need a drill or any power tools. Clamps simply tighten and loosen by hand or with a socket wrench.
For retractable covers with powered motors, you may also need a trim removal tool to disconnect wiring harnesses without damaging the clips. Check your owner's manual for model-specific requirements before you begin.
How to Remove a Soft Roll-Up Tonneau Cover
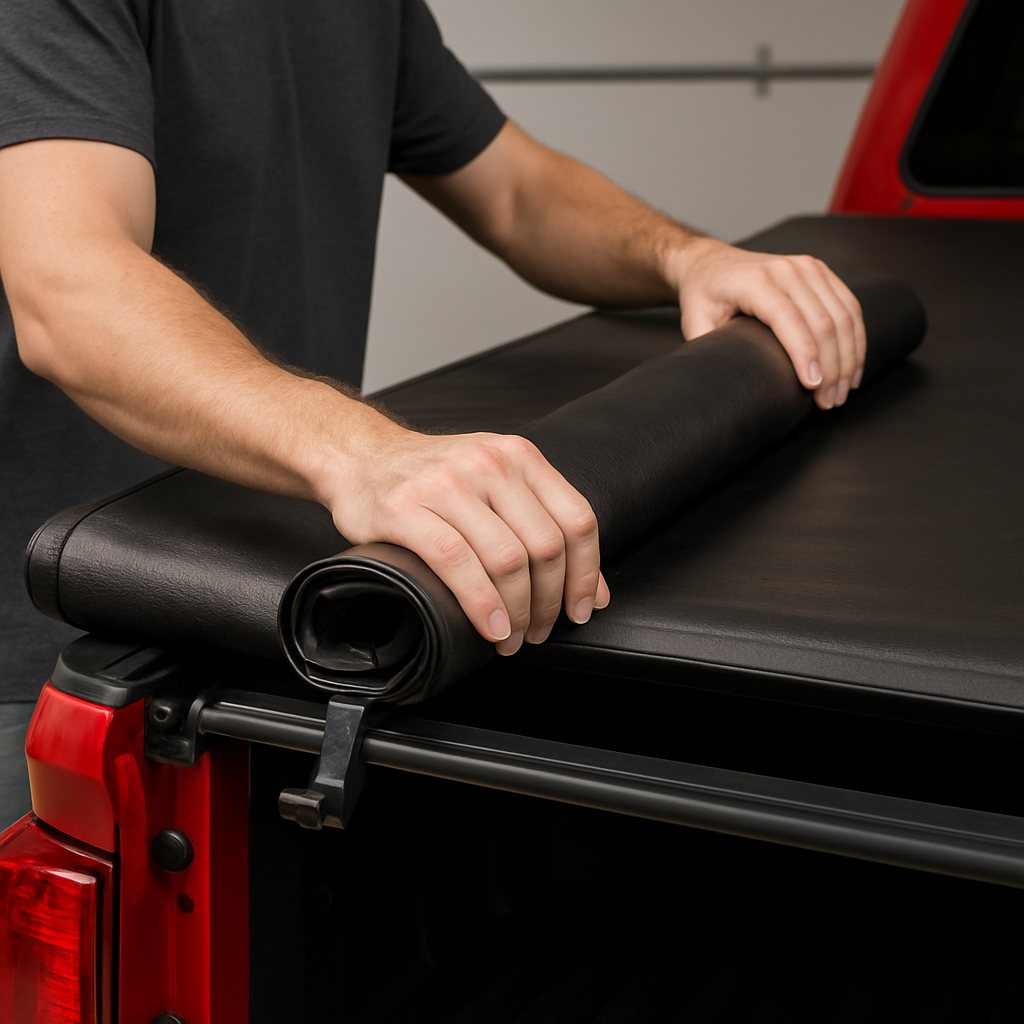
Soft roll-up covers are the easiest type to remove. Most use simple clamp-on rail systems with no drilling, so the entire process takes 10-15 minutes.
- Roll the cover forward: unstrap or unlatch the cover at the tailgate end and roll it all the way toward the cab. Secure it with the built-in straps so it stays rolled up.
- Mark your clamp positions: use painter's tape to mark where each clamp sits on the bed rail. This saves guesswork during reinstallation.
- Loosen the clamps: starting at the tailgate end, use your socket wrench or Allen key to loosen each clamp bolt. Most covers have 4-6 clamps per side. Loosen them all before removing any.
- Lift the cover off: once all clamps are loose, lift the entire rail-and-cover assembly straight up and off the bed rails. Soft roll-ups typically weigh 15-25 lbs, so one person can handle this easily.
- Remove the header bar: some models have a separate header bar at the cab end that unbolts independently. Remove it last.
Bag all clamps and bolts together immediately. Label the bag "tonneau clamps" so you don't lose them in your garage. If you're removing the cover to haul something tall, you can leave the rails installed and just detach the vinyl cover from the rails — check your manual for quick-detach instructions.
How to Remove a Tri-Fold Tonneau Cover
Tri-fold covers — both soft and hard versions — fold into three panels that stack near the cab. Removal is straightforward but varies slightly between soft and hard models. Expect 15-20 minutes for the job.
For soft tri-fold covers:
- Fold all panels forward toward the cab so the cover is fully collapsed.
- Unlatch any cab-end clamps or hooks that secure the folded cover to the front rail.
- Loosen the side clamps using your socket wrench. Most soft tri-folds use 4 clamps total — two per side.
- Lift the entire assembly off the bed. These weigh 20-30 lbs and are manageable solo.
For hard tri-fold covers:
- Fold all three panels forward and latch them in the stacked position.
- Disconnect any prop rods or gas struts if your model uses them.
- Unbolt the mounting clamps — hard tri-folds typically use beefier clamps with 13mm or 15mm bolts.
- Have a helper grab the opposite side. Hard tri-folds weigh 40-60 lbs and are awkward to carry alone.
- Lift straight up and set the cover on a moving blanket or soft surface to avoid scratching the panels.
Hard tri-fold panels can crack if flexed the wrong way, so always carry them in the folded position — never try to separate panels unless the manufacturer's instructions specifically allow it.
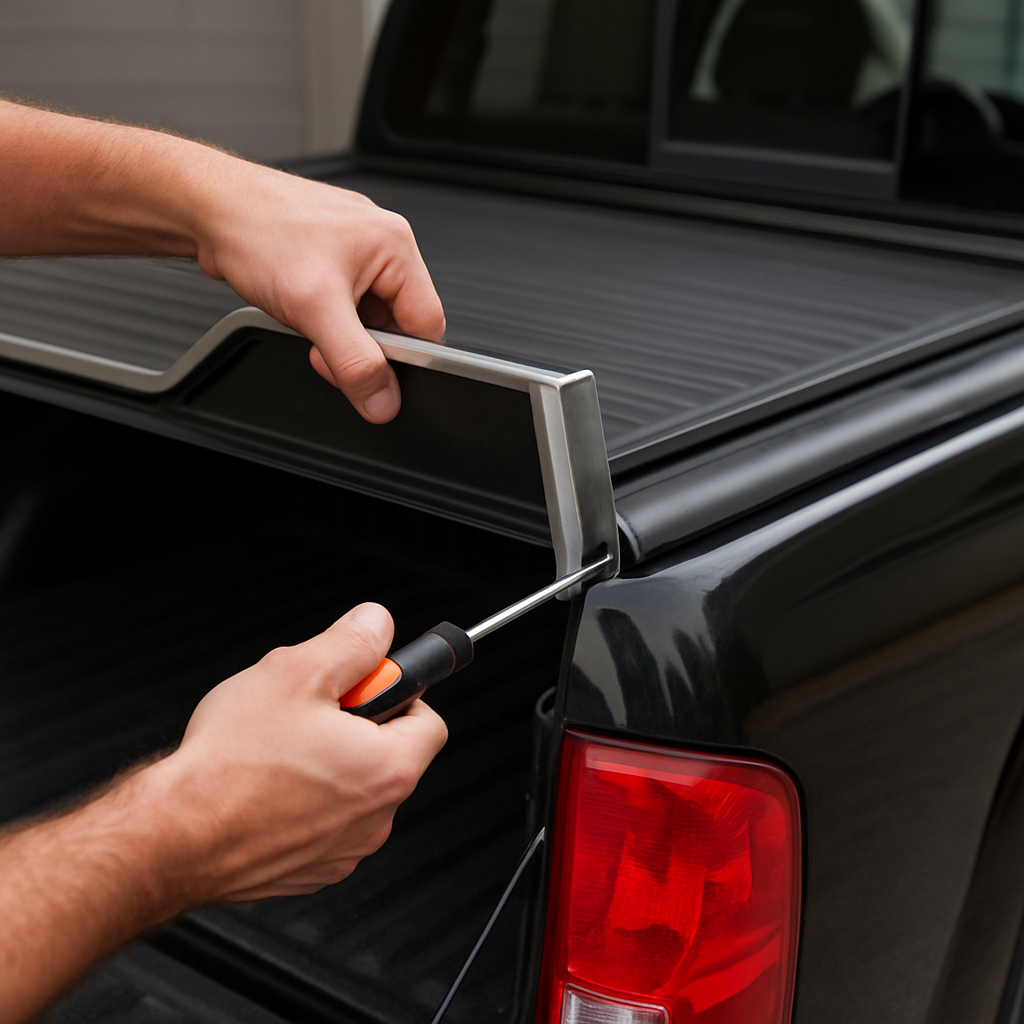
How to Remove a Hard One-Piece or Hinged Tonneau Cover
Hard one-piece covers and hinged (paintable) covers are the heaviest and most awkward to remove. These solid fiberglass or ABS shells can weigh 60-80 lbs, so you absolutely need a second person. Plan for 20-30 minutes.
- Open the cover fully and prop it up with the gas struts or prop rod. Make sure it's stable before you start unbolting.
- Disconnect gas struts: most struts attach with ball-and-socket joints. Use a flathead screwdriver or trim tool to pop the strut ends off their mounting balls. Remove both struts and set them aside.
- Locate the hinge bolts: hinged covers attach at the cab end with 2-4 bolts per side, usually 13mm or 15mm. These bolt through the bed rail or into a mounting rail.
- Support the cover: have your helper hold the cover while you remove the hinge bolts. Never unbolt both sides without someone supporting the cover — it will slide and scratch your bed rails or tailgate.
- Lift and carry: with all bolts removed, carefully lift the cover straight up and carry it to a safe storage location. Set it upside-down on a soft blanket to protect the painted surface.
- Pro tip: take a photo of the hinge mounting position before removal — this makes realignment much easier later
- Warning: if your cover has an integrated third brake light or wiring, disconnect the electrical harness before lifting the cover off
If you're considering a different style, choosing the right tonneau cover for your truck depends on how you use your bed and how often you need full access. Don't forget to secure your tailgate with a quality tailgate lock while the bed is exposed.
How to Remove a Retractable Tonneau Cover
Retractable covers are the most complex to remove because of their canister housing and track system. Manual and powered retractable covers both follow a similar process, but powered models add wiring steps. Budget 30-45 minutes and definitely have a helper.
- Retract the cover fully into the canister at the cab end. For powered models, make sure the cover is completely housed before you disconnect anything electrical.
- Disconnect wiring (powered models only): locate the wiring harness — usually routed along the driver's side bed rail to the cab. Unplug the connector and carefully pull the wiring free from any clips or channels. Use a trim removal tool to avoid breaking clips.
- Remove the drain tubes: retractable canisters have drain tubes that route water out the sides. Pull these tubes off their fittings — have a rag handy, there may be residual water.
- Unbolt the side rails: the canister sits on two side rails that run the full length of the bed. Each rail is typically secured with 6-10 clamps. Loosen all clamps on both sides before removing any.
- Separate the canister from the rails (if applicable): some models let you remove just the canister and leave the rails. Check your manual.
- Lift the assembly out: retractable covers with canisters weigh 50-80 lbs. Lift straight up with your helper, keeping it level so internal components don't shift.
Store the canister upright or flat — never on its side where the cover slats can bunch up. Cap any drain tube fittings and wrap the wiring harness connector in a zip-lock bag to keep moisture out.
Storing Your Tonneau Cover Properly
Removing the cover is only half the job. Proper storage prevents damage, warping, and lost hardware so reinstallation goes smoothly when you're ready.
General storage rules:
- Indoor storage: always store your cover inside a garage, shed, or climate-controlled space. UV exposure and temperature swings degrade vinyl, rubber seals, and even ABS plastic over time.
- Flat surface: hard covers should rest flat on a padded surface. Never lean them against a wall long-term — they can warp or bow.
- Soft covers: roll-up covers can hang on a wall hook or sit rolled-up on a shelf. Avoid folding soft vinyl against its natural roll direction.
- Cover it up: drape a moving blanket or old bedsheet over the cover to prevent dust buildup and scratches from nearby garage items.
Hardware organization matters:
- Label everything: use labeled zip-lock bags — one for clamps, one for bolts, one for rails if removed
- Tape bags to the cover: stick the hardware bags directly to the cover with painter's tape so everything stays together
- Keep the manual: tuck the installation manual into the hardware bag — you'll want it for reinstallation
- Take photos: before and during removal, snap photos of clamp positions, wiring routes, and drain tube locations
If you plan to leave the cover off for an extended period (months or longer), apply 303 Aerospace Protectant to vinyl covers and rubber seals before storing. This prevents cracking and UV damage even in storage.
Should You Remove the Mounting Rails?
Once the cover itself is off, you're left with a decision: leave the mounting rails on or remove them too? The answer depends on your plans.
Leave the rails on if:
- You're reinstalling soon: hauling something tall this weekend and putting the cover back on Monday? Leave the rails. No point in extra work.
- The rails sit flush: most modern clamp-on rails are low-profile and won't interfere with cargo or bed liners.
- You want quick reinstallation: with rails in place, putting the cover back takes half the time — just set it on and tighten the clamps.
Remove the rails if:
- You're switching cover types: different covers use different rail systems, so the old rails need to come off anyway.
- The rails interfere with accessories: bed racks, toolboxes, or cargo management systems sometimes conflict with tonneau rails.
- You're selling the truck: remove everything and fill any bolt holes with bed-rail caps or rubber plugs.
- Aesthetics: empty rails with no cover look unfinished — better to have a clean bed rail.
If you do remove the rails, inspect the bed rail surface underneath. Clean any adhesive residue with Goo Gone or rubbing alcohol, and check for paint wear or minor rust spots. Touch up any bare metal with matching paint or a rust inhibitor to prevent corrosion.
For bolt-on rail systems that drilled into the bed rail, cap the holes with rubber bed-rail plugs (available at any auto parts store for a few dollars). Open bolt holes collect water and cause rust surprisingly fast.
Troubleshooting Common Removal Problems
Even a straightforward removal can hit snags. Here are the most common issues and how to solve them.
Stuck or seized clamp bolts:
- Apply penetrating oil (PB Blaster or WD-40 Specialist) to the bolt and let it soak for 10-15 minutes
- Use a 6-point socket instead of a 12-point to get a better grip and reduce the risk of rounding the bolt head
- Tap the wrench handle with a rubber mallet to break the corrosion seal — don't use excessive force or you'll strip the bolt
Cover won't lift off the rails:
- Check for hidden clamps: some covers have additional clamps at the center of the bed rail that are easy to miss
- Look for sealant tape: some installations use foam weatherstripping tape between the rail and the bed, which acts like adhesive over time. Gently pry with a plastic trim tool.
- Verify all header bar bolts are removed: the front header bar sometimes has separate mounting bolts from the side clamps
Electrical connector won't disconnect (retractable/powered covers):
- Look for a release tab: most automotive connectors have a small tab that must be pressed or lifted before pulling apart
- Don't yank the wires: pull on the connector housing, never the wires themselves
- Spray electrical contact cleaner into the connector if it's corroded — this lubricates and helps it release
Scratched bed rails during removal:
- Prevent it: lay painter's tape along the top of the bed rails before you start — this catches any metal-on-metal contact
- Fix it: minor scratches can be buffed out with rubbing compound. Deep scratches need touch-up paint to prevent rust.
Related Articles
- Best Tonneau Covers for Trucks — Helps readers choose the right replacement cover type if they're removing their current one to switch styles
- How to Install a Tonneau Cover: Complete Step-by-Step Guide — Companion guide for readers who need to reinstall their cover after removal or install a new one
- How to Install a Truck Bed Liner — Section 6 naturally mentions bed liners when discussing whether rails interfere with cargo — readers considering bed protection will find this relevant.
- Best Tailgate Locks for Trucks — Section 3 discusses leaving the bed exposed after cover removal — a natural spot to mention securing the tailgate while the bed is uncovered.
- Best Truck Bed Cargo Nets — The section discusses accessories that conflict with tonneau rails — cargo management systems is a natural anchor since readers removing a cover may be adding cargo nets instead
Conclusion
Frequently Asked Questions
Can one person remove a tonneau cover alone?
How long does it take to remove a tonneau cover?
Do I need special tools to remove a tonneau cover?
Will removing a tonneau cover damage my truck?
Should I remove the mounting rails when I take off the cover?
Can I remove a tonneau cover temporarily for hauling?
How do I store a tonneau cover after removing it?
Do tonneau covers affect gas mileage when removed?
Affiliate Disclosure: This article contains affiliate links. If you purchase through these links, we may earn a commission at no extra cost to you.