How to Install Running Boards on Your Truck
Key Takeaways
- Most running board installations take 30-60 minutes per side with basic hand tools and no drilling required.
- Always verify your mounting bracket kit matches your exact truck year, make, model, and cab configuration before starting.
- Torque all bolts to manufacturer specifications — over-tightening can strip factory mounting points and cause long-term damage.
- No-drill running boards use existing factory holes or pinch welds, while custom installations may require drilling into the frame.
- A second person makes installation significantly easier for holding the board in position while you secure the brackets.
Types of Running Boards and Mounting Styles
Before you start the installation, it helps to understand the different types of running boards and how they mount. Your mounting method determines the tools you need and the complexity of the job.
- Bolt-on running boards: Use factory-threaded holes or existing body mount bolts. No drilling required. This is the most common type for aftermarket kits.
- No-drill clamp-on boards: Attach to the pinch weld beneath the rocker panel using clamp brackets. Great for leased trucks or if you want a reversible install.
- Drill-in running boards: Require drilling new holes into the frame or body. Common with universal-fit boards or heavy-duty rock sliders.
- Electric/power running boards: Extend automatically when the door opens. These require wiring in addition to bracket mounting.
Most truck-specific kits from major brands are bolt-on designs that use your truck's existing factory mounting points. These are engineered for your exact vehicle, so fitment is precise and installation is straightforward.
If you're still deciding which style suits your truck, our roundup of the best running boards for trucks covers the top options across every category and budget. Choose your boards before you start gathering tools — the mounting style dictates your installation process.
- Nerf bars: Round tubular design, typically 3-4 inches in diameter with step pads.
- Flat step boards: Wide, flat stepping surface for maximum grip. Ideal for lifted trucks.
- Rock sliders: Heavy-duty steel rails that double as rocker panel armor for off-road use.
Tools and Materials You Need
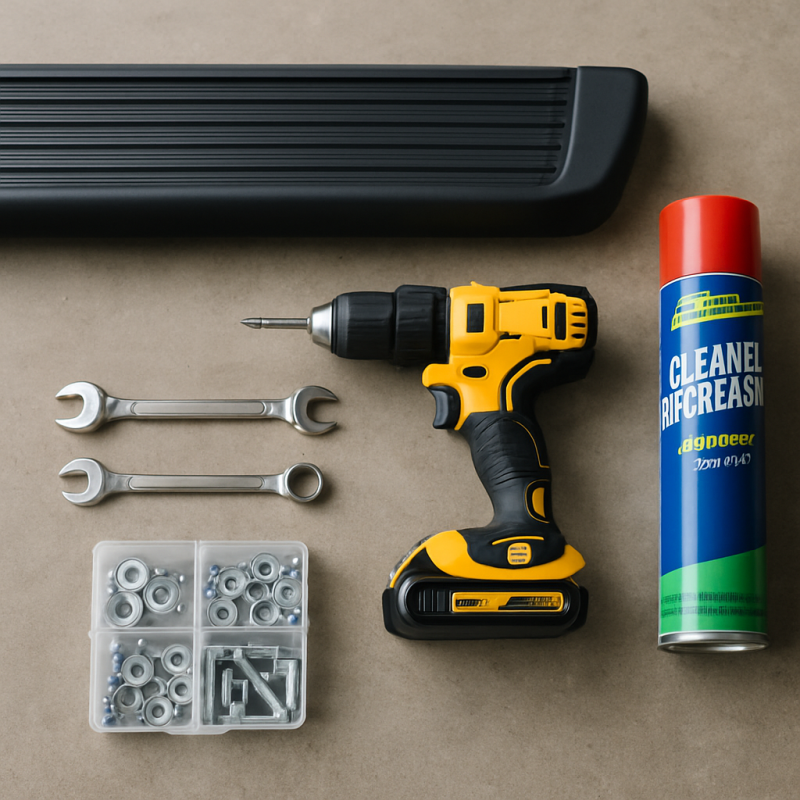
Running board installation requires only basic hand tools that most truck owners already have in their garage. Gather everything before you start so you're not hunting for sockets mid-install.
- Socket wrench set: 10mm, 13mm, 15mm, 17mm, and 19mm are the most common sizes for truck mounting hardware.
- Torque wrench: Essential for tightening bolts to manufacturer specs — usually 25-35 ft-lbs for bracket bolts.
- Ratchet extensions: A 6-inch extension helps reach recessed factory mounting points.
- Allen key set: Some bracket kits use hex bolts instead of standard hardware.
- Tape measure: For verifying bracket spacing and ensuring even alignment side to side.
- Painter's tape or masking tape: Mark bracket positions before drilling (if required).
- Penetrating oil (PB Blaster or WD-40): Loosens factory bolts that may have corroded, especially on trucks older than 3 years.
- Jack and jack stands: Optional but helpful for better access underneath the truck.
For drill-in installations, you'll also need a power drill, the correct drill bit size (specified in your kit instructions), and thread-locking compound like Loctite Blue 242.
A cordless impact driver speeds things up considerably but isn't required. If you're working on a lifted truck, access is easier — but for stock-height trucks, having a creeper or cardboard to lie on makes the job more comfortable.
Preparing Your Truck for Installation
Proper preparation prevents headaches during installation. Spend 10-15 minutes on prep work before you touch the first bracket.
Step 1: Park on a flat, level surface. Uneven ground makes it impossible to align running boards evenly. A garage floor or flat driveway works best.
Step 2: Clean the mounting area. Use a degreaser or rubbing alcohol to clean the rocker panels and underside of the cab where brackets will attach. Dirt and road grime can prevent brackets from sitting flush.
- Wire brush: Remove any surface rust from factory mounting points.
- Compressed air: Blow out debris from threaded holes so bolts thread smoothly.
Step 3: Verify your kit contents. Lay out all brackets, hardware, and running boards. Match them against the parts list in your instructions. Contact the manufacturer immediately if anything is missing — don't try to improvise with mismatched hardware.
Step 4: Identify driver and passenger sides. Most kits label brackets as "L" (left/driver) and "R" (right/passenger). Running boards themselves are often side-specific due to mounting hole patterns. Getting this wrong means unbolting everything and starting over.
This is also a good time to spray penetrating oil on any factory bolts you'll need to remove. Let it soak for 10 minutes while you organize your tools. Trucks driven in northern states with road salt often have seized bolts — the penetrating oil saves you from rounding bolt heads.
Installing the Mounting Brackets
Brackets are the foundation of your running board installation. Getting them right means a solid, rattle-free result. Getting them wrong means a wobbly board that loosens over time.
Step 1: Locate factory mounting points. Look underneath the rocker panel for existing threaded holes or body mount bolts. Your kit's instructions will include a diagram showing exact locations. Most trucks have 3-4 mounting points per side.
- Ford F-150: Uses factory body mount bolts at 3 points per side.
- Chevy Silverado/GMC Sierra: Threaded holes behind plastic plugs along the rocker panel.
- Ram 1500: Combination of body mount bolts and threaded frame holes.
- Toyota Tacoma/Tundra: Factory threaded holes with plastic covers that pop out.
Step 2: Remove plastic plugs or factory bolts. Pop out any plastic covers with a flat-head screwdriver. If removing existing body mount bolts, do them one at a time — remove the factory bolt, install the bracket with the new longer bolt, then move to the next point.
Step 3: Hand-thread all bracket bolts first. This is critical. Thread every bolt in by hand to avoid cross-threading. Only after all bolts are hand-tight should you begin torquing them down.
Step 4: Torque to spec. Use your torque wrench set to the manufacturer's specification. Typical values are 25-35 ft-lbs for bracket bolts. Over-tightening can strip threads in the body or frame — and that's an expensive problem to fix.
Repeat the entire process on the other side. Take your time aligning brackets — even a small misalignment here will show as a crooked running board later.
Attaching the Running Board to the Brackets
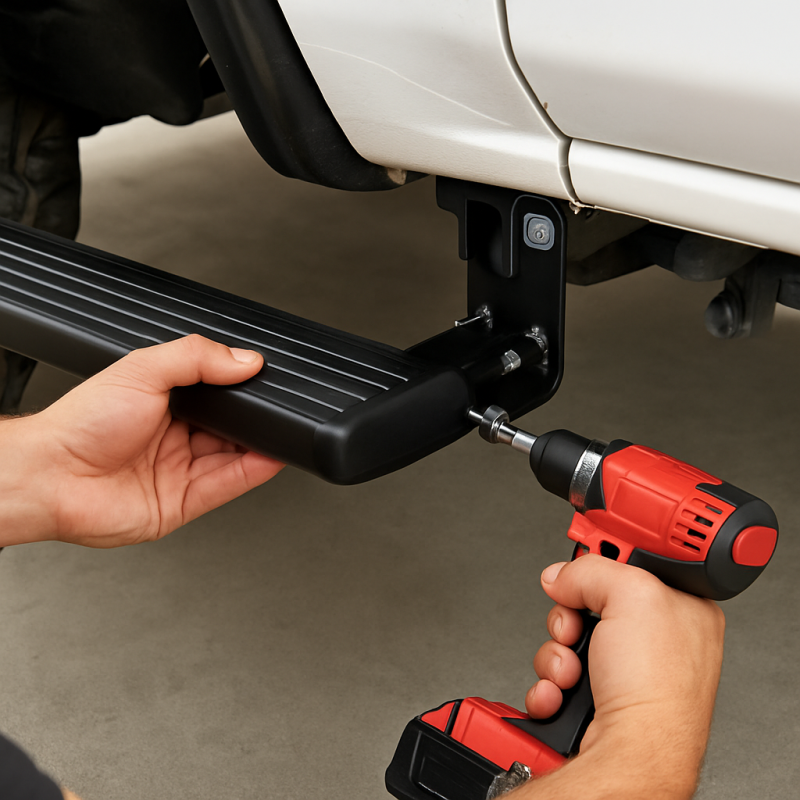
With the brackets secured, the running board itself goes on quickly. This is where having a helper makes a real difference.
Step 1: Lift the running board into position. Running boards weigh between 15-40 lbs depending on material. Aluminum boards are lighter, steel boards are heavier. Have a second person support one end while you align the other.
- Tip: Set a block of wood or small box under the board to hold it at bracket height while you work. This frees both hands for bolt installation.
- Tip: Start at the front bracket and work backward — the front position sets the alignment for the rest.
Step 2: Insert mounting bolts through the board into the brackets. Most kits use carriage bolts from the top down or hex bolts from the bottom up. Insert all bolts loosely before tightening any of them.
Step 3: Check alignment before final tightening. Step back and look at the board from the front and rear of the truck. It should be parallel to the rocker panel with even gaps. Measure the distance from the board to the rocker panel at the front and rear — they should match within 1/8 inch.
Step 4: Torque the board-to-bracket bolts. These are typically tightened to 20-30 ft-lbs. Work in a star pattern if you have 4+ bolts — front, rear, then middle — to distribute clamping force evenly.
Once complete, grab the board and try to shake it. There should be zero movement. If it moves or rattles, check for a bolt you missed or a bracket that isn't flush against the frame.
Final Checks and Adjustments
Your running boards are mounted, but you're not done yet. A few final checks ensure a safe, long-lasting installation.
- Weight test: Step on the running board at multiple points — front, center, and rear. It should feel solid with no flexing or shifting. Most running boards are rated for 300-500 lbs of static load.
- Door clearance: Open and close all doors on both sides. Running boards should not interfere with door operation. Pay special attention to rear doors on crew cabs.
- Ground clearance: Check that the installed boards don't reduce ground clearance below your comfort level, especially if you plan to go off-road.
- Visual alignment: Stand at the front of the truck and look down the length of each board. Both sides should appear symmetrical.
After your first 50 miles of driving, re-torque every bolt on both sides. Vibration from driving can cause new hardware to settle slightly. Set a reminder on your phone so you don't forget this critical step.
If you've done any drilling, apply touch-up paint or rust inhibitor to exposed metal. Bare steel holes will rust quickly, especially in humid or winter climates. A dab of clear nail polish works in a pinch.
Once your running boards are secure, you might want to tackle other exterior upgrades. If you're looking to protect your front end, quality bull bars pair well with running boards for a cohesive look. Similarly, fender flares complete the rugged appearance and protect your paint from tire spray.
Common Mistakes to Avoid
Even experienced DIYers make mistakes during running board installations. Here are the most common ones and how to avoid them.
- Wrong kit for your truck: Running boards are vehicle-specific. A kit for a 2019 F-150 SuperCrew won't fit a 2019 F-150 SuperCab. Double-check year, make, model, and cab configuration before ordering.
- Skipping the torque wrench: "Good and tight" is not a torque specification. Under-torqued bolts loosen from vibration. Over-torqued bolts strip threads or crack brackets. Use the torque wrench.
- Tightening bolts in sequence instead of stages: Fully tightening the first bolt before touching the second creates uneven stress. Always hand-tighten all bolts first, then torque them in stages.
- Installing brackets on the wrong side: Left and right brackets are mirror images of each other. Installing them on the wrong side means mounting holes won't align with the running board. Check the L/R markings.
- Forgetting the re-torque: New hardware settles during the first 50-100 miles. Failing to re-torque causes rattles and can lead to bolts backing out entirely.
Another common issue is installing running boards on a rusty truck without addressing the rust first. If your factory mounting points are corroded, the bolts won't hold proper torque. Use a wire brush and rust converter on the mounting surfaces before installation.
Finally, don't force anything. If a bracket doesn't align with the mounting holes, you likely have the wrong bracket or the wrong side. Forcing bolts into misaligned holes damages threads and creates a weak mounting point. Similar to installing fender flares, patience during alignment pays off with a clean, professional result.
Troubleshooting Running Board Issues
Even after a clean installation, problems can pop up. Here's how to diagnose and fix the most common running board issues.
Rattling or vibration noise:
- Check all bolts for proper torque — a single loose bolt can cause the entire board to vibrate.
- Add rubber washers or adhesive foam tape between the board and brackets to dampen vibration.
- Verify all brackets are sitting flush against their mounting surfaces.
Board sits crooked or uneven:
- Loosen all board-to-bracket bolts and re-align. The bracket slots usually allow 1/4 inch of adjustment.
- Check if one bracket is mounted at the wrong point — compare bracket positions side to side.
- On trucks with body lift kits, stock bracket locations may shift. Measure from a fixed reference point like the door seam.
Bolts won't thread into factory holes:
- Factory holes may be clogged with undercoating or paint. Chase the threads with a tap or carefully clean them with a bolt and penetrating oil.
- If threads are stripped, use a thread repair insert (Helicoil) or move to the next available mounting point.
Running board sags under weight:
- Ensure you're using all the brackets included in the kit — skipping a middle bracket causes flex.
- Check the weight rating. Budget running boards rated for 200 lbs won't handle heavier passengers.
If you're also dealing with road spray hitting your truck's lower body, adding proper mud flaps alongside your new running boards provides comprehensive lower body protection.
Related Articles
- Best Running Boards for Trucks — Comprehensive review of top running board options to help readers choose the right boards before installation
- Best Truck Bull Bars for Front-End Protection — Complementary exterior upgrade that pairs well with running boards for front-end protection
- Best Truck Fender Flares for Silverado & F-150 — Another exterior accessory that completes the rugged look alongside running boards
- How to Install Fender Flares on Your Truck — Similar DIY installation guide that shares alignment and mounting techniques
- Best Truck Mud Flaps for Every Setup — Complementary upgrade for lower body protection alongside running boards
Conclusion
Frequently Asked Questions
How long does it take to install running boards?
Can I install running boards by myself?
Do running boards require drilling?
Will running boards void my truck warranty?
How much weight can running boards hold?
Do running boards affect gas mileage?
What size socket do I need for running board installation?
Can I install running boards on a lifted truck?
Affiliate Disclosure: This article contains affiliate links. If you purchase through these links, we may earn a commission at no extra cost to you.