How to Install Fender Flares on Your Truck
Key Takeaways
- Most fender flare installations take 1-3 hours with basic hand tools and no professional help required.
- No-drill fender flares use factory holes and clips, while bolt-on styles require drilling into the fender for a permanent mount.
- Thorough surface prep with rubbing alcohol and proper alignment before fastening prevents paint damage and uneven gaps.
- Always dry-fit every flare panel before committing to any screws, bolts, or adhesive tape to catch fitment issues early.
- Factory mud flaps, running board brackets, and existing trim clips must be removed before test-fitting your new flares.
Tools and Materials You'll Need
Before you start, gather everything so you're not running to the hardware store mid-install. The exact tool list depends on whether your flares are no-drill (clip-on) or bolt-on (drill required), but most kits share a common set of essentials.
- Socket and ratchet set: 7mm, 8mm, and 10mm sockets cover most fastener sizes included with flare kits
- Phillips and flathead screwdrivers: for factory trim clips and included hardware
- Trim removal tool: plastic pry tools prevent scratching paint when removing existing clips and moldings
- Rubbing alcohol and microfiber cloths: for degreasing the fender surface before adhesive tape contact
- Drill with step bit or standard bit: only needed for bolt-on installations — check your kit's required hole diameter
- Masking tape and marker: for marking drill points and protecting surrounding paint
- Touch-up paint or clear coat: to seal any freshly drilled holes and prevent rust
If your kit includes rubber gasket seal or foam tape along the flare edge, make sure the ambient temperature is above 60°F. Adhesive bonds poorly in cold weather, and you'll end up with flares that peel away within weeks.
Most kits include all mounting hardware — bolts, clips, washers, and rubber seals. Open your kit box first and cross-reference the included parts with the instruction sheet. Missing a single clip can mean a trip back to the dealer or a long wait on a replacement shipment. If your truck has factory mud flaps or splash guards, you'll likely remove them during installation. Keep those bolts in a labeled bag in case you ever want to revert.
Preparing Your Truck for Installation
Proper prep work is the difference between flares that look factory-installed and flares that rattle loose after a month. Budget 20-30 minutes for this step alone.
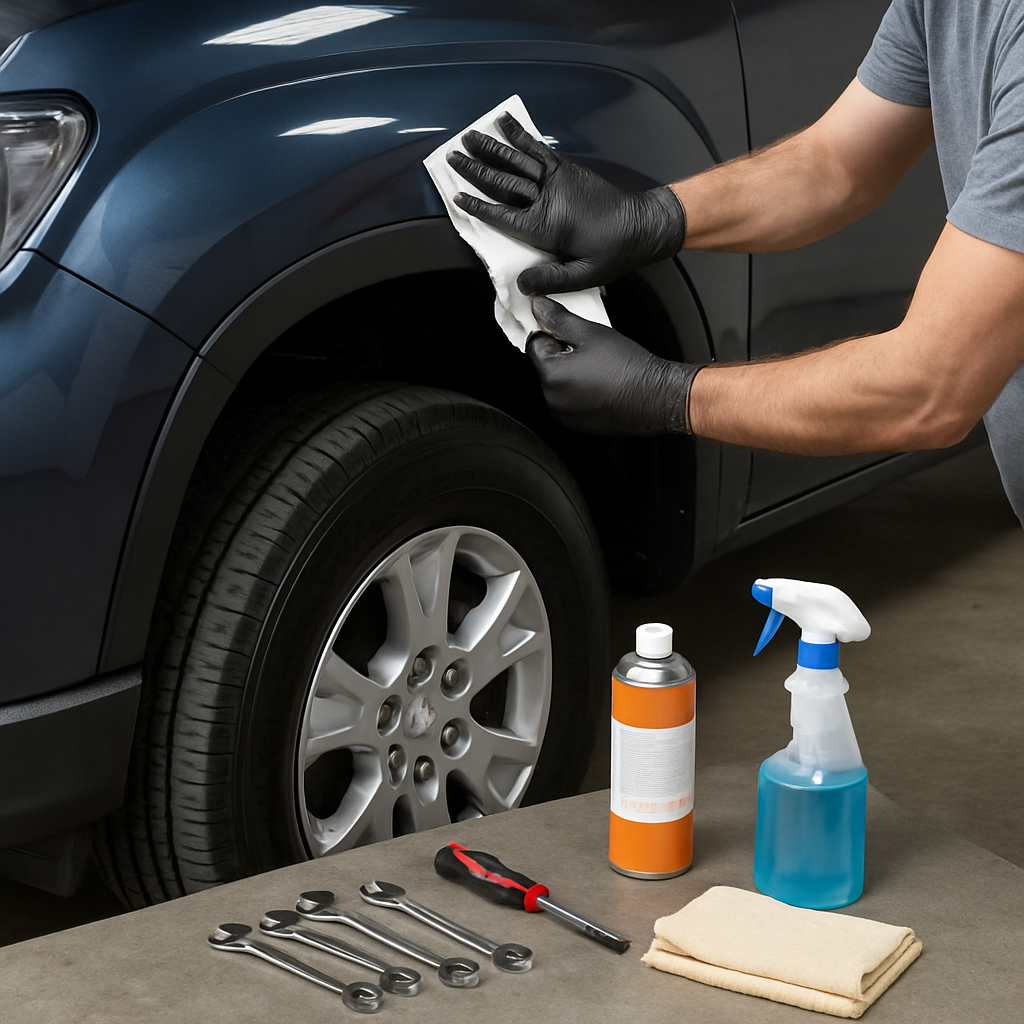
Start by washing the fender area thoroughly. Road grime, wax, and silicone residue prevent adhesive tape from bonding and hide paint imperfections you'll want to address before covering them up.
- Wash and dry: hit the fender wells and outer fender panels with soap and water, then dry completely
- Degrease: wipe the entire mounting surface with rubbing alcohol or a dedicated prep solvent — this is critical for adhesive-backed kits
- Remove factory components: pull off existing mud flaps, splash guards, and any plastic trim clips along the fender edge using a trim removal tool
- Inspect for rust: check the fender lip and wheel well for rust spots — sand, treat with rust converter, and seal with primer before mounting flares over problem areas
If your truck has pinch-weld trim along the fender, some flare kits require you to remove it. Others mount directly over the top. Check your instructions carefully. Removing pinch-weld trim reveals factory holes that many no-drill kits rely on for clip retention.
This is also a good time to tackle other exterior projects. If you've been putting off upgrading your headlight bulbs, doing it the same weekend keeps your truck off jack stands only once. Once the fenders are clean and all factory components are removed, you're ready for the dry-fit step.
Dry-Fitting the Flares Before Mounting
This step catches alignment problems before they become permanent. Never skip the dry fit — it takes 10 minutes per flare and can save you hours of frustration.
- Hold each flare in position: press it against the fender and check the gap between the flare edge and the body panel — it should be consistent from front to back
- Check hardware alignment: if your kit uses factory holes, verify that every mounting tab lines up with an existing hole
- Confirm tire clearance: turn your steering wheel lock-to-lock while watching the front flares — make sure nothing contacts the tire at full articulation
- Mark mounting points: use masking tape to mark the exact position where each flare sits, so you can replicate the alignment perfectly during final install
Pay special attention to the rear flares near the bed. On many trucks, the rear flare wraps around the bed corner and sits very close to the tailgate gap. If the flare is even slightly misaligned, it can interfere with the tailgate or create an uneven visual line along the bed rail. If you have a tonneau cover installed, verify the rear flares don't contact the cover's weatherstripping or side rails.
During the dry fit, have a helper hold the flare while you step back and eyeball the gap from five feet away. Close-up inspection makes small misalignments invisible. What looks perfect at arm's length may appear crooked from the driver's perspective. Once you're satisfied with the position, leave the masking tape markers in place and move on to the actual mounting process.
No-Drill Installation: Clip-On Fender Flares
No-drill installations are the most popular option because they're completely reversible. You won't void your warranty, damage the paint, or create rust points. Most OEM-style and street-style flares use this method.
Here's the step-by-step process:
- Peel the adhesive backing: remove the protective liner from the foam tape along the back edge of the flare — work one section at a time to prevent the tape from collecting dust
- Position the flare: align it with your masking tape markers from the dry-fit step and press it gently against the fender — don't push hard yet
- Insert mounting clips: push the included retaining clips through the flare's mounting tabs and into the factory holes along the fender lip
- Seat the clips fully: use a trim clip installer or the flat side of a screwdriver to press each clip until it snaps into the sheet metal
- Apply firm pressure to adhesive areas: run your palm along every inch of the adhesive tape contact area for at least 30 seconds to activate the bond
- Install any supplied screws: some no-drill kits include one or two small self-tapping screws for the inner fender liner as secondary retention — drive these in with a Phillips screwdriver
After all four flares are mounted, park the truck in direct sunlight for at least two hours. Heat accelerates adhesive curing. Avoid pressure washing the flares or driving through deep mud for 48 hours while the foam tape reaches full bond strength.
If any clip feels loose or doesn't snap firmly, don't force it. Check for debris in the factory hole, widen it slightly with a step bit if the factory punch was undersized, or contact the flare manufacturer for replacement clips with the correct shank diameter.
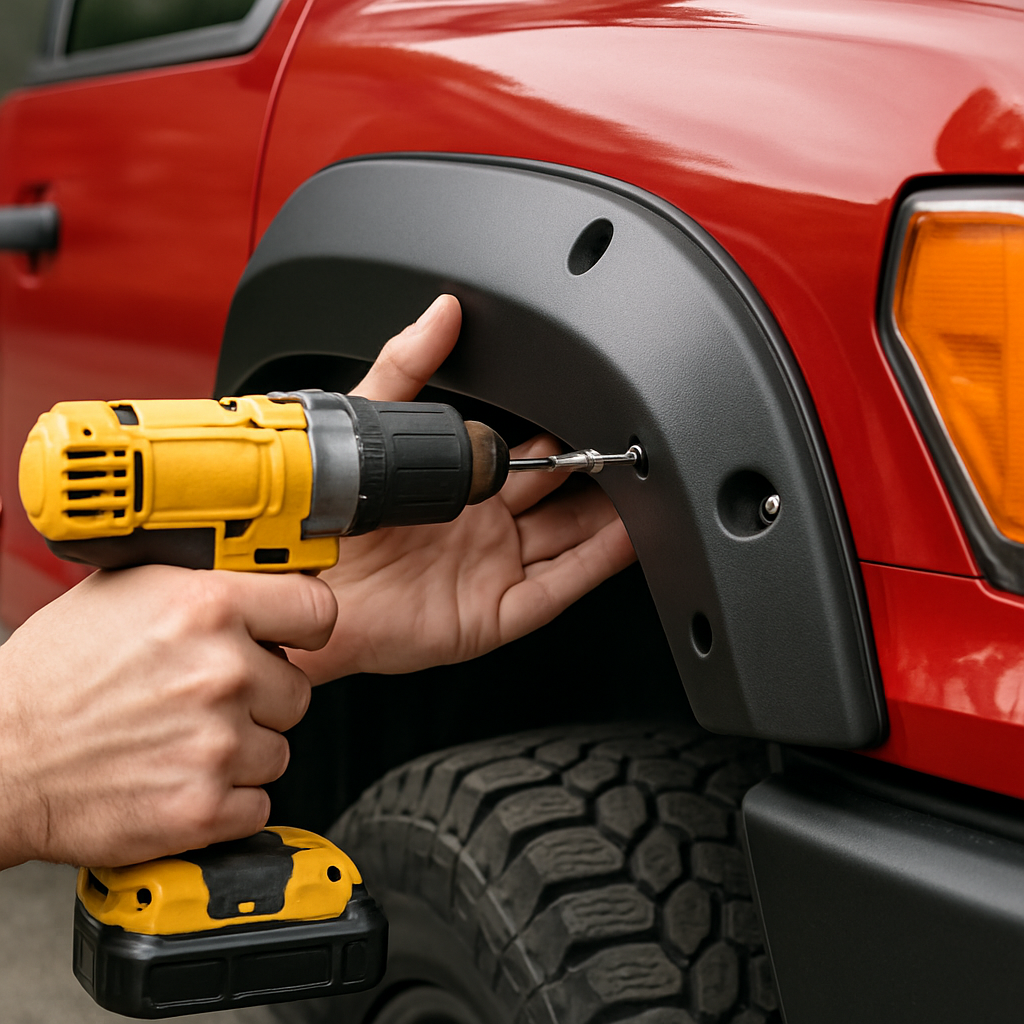
Bolt-On Installation: Drilling Into the Fender
Bolt-on flares deliver the most secure, rattle-free fit — especially important for off-road trucks that see washboard trails and heavy vibration. The tradeoff is that drilling is permanent. Once those holes exist, they're part of your truck forever.
Follow this process for a clean bolt-on install:
- Mark drill points: hold the flare in position using your dry-fit alignment marks, then use a marker to dot each mounting hole location through the flare's tabs onto the fender
- Remove the flare and apply masking tape: tape over each drill mark to prevent the bit from skating across the paint
- Drill pilot holes: use a small pilot bit (1/8") first, then step up to the final diameter specified in your kit — typically 5/16" or 3/8"
- Deburr and seal: remove metal shavings with a deburring tool, then immediately apply touch-up paint or clear coat to the raw metal inside each hole
- Apply rubber gaskets: slide the included rubber grommets or gasket washers over each bolt — these prevent metal-on-metal contact and water intrusion
- Mount the flare: hold the flare in position, insert bolts from the outside through the flare and fender, and thread the nuts from inside the wheel well
- Tighten evenly: snug all bolts to finger-tight first, then torque them evenly in a cross pattern — over-tightening warps the flare
A step drill bit is your best friend here. Unlike standard twist bits, step bits cut clean holes in sheet metal without grabbing and tearing. They're also easier to control on curved surfaces like fenders.
Always seal drilled holes from the inside with a dab of rust-preventive primer. Fender flares trap moisture between the flare and the body panel, and untreated drill holes will develop rust within a single winter season.
Aligning and Adjusting for a Perfect Fit
Even after following the dry-fit steps, minor adjustments are usually needed. Factory body panels have slight variations from truck to truck, and fender flare molds aren't always perfect either.
- Uneven gaps: if the gap between the flare and the body is wider at one end, loosen the closest mounting clip or bolt, shift the flare slightly, and retighten — work from the center outward
- Flare sticking out too far: this usually means the mounting clips aren't fully seated — push each one in firmly until you hear or feel the snap
- Flare sitting too tight to the body: check if adhesive foam tape is bunched or doubled over — peel back and reposition if needed
- Tailgate interference (rear flares): if the rear flare contacts the tailgate when opening, shim the flare outward by adding a thin rubber washer behind the mounting point closest to the bed corner
For trucks with tonneau covers installed, check that the rear flare edges don't press against the cover's side seals. A tight fit can create water channels that leak into the bed during rain. Leave at least a 1/8" gap between the flare edge and any bed-mounted accessories.
Once everything is aligned, do a final walk-around inspection. Stand at each corner of the truck and sight down the body line. The flare's top edge should follow the fender arch smoothly without dipping, rising, or showing daylight gaps. Take your truck for a short drive over bumpy roads and then re-check. Vibration can reveal clips that didn't fully seat or bolts that need another quarter-turn.
Post-Installation Care and Maintenance
Fender flares are low-maintenance, but a little care keeps them looking new and prevents long-term damage to the paint underneath.
- First 48 hours: avoid pressure washers, car washes with brushes, and high-speed highway driving in heavy rain — the adhesive needs time to fully cure
- Monthly inspection: check all clips and bolts for looseness, especially after off-roading or driving on rough terrain
- Cleaning: wash flares with the same soap and water you use on the rest of the truck — avoid harsh solvents on painted or textured flares
- UV protection: unpainted plastic flares fade over time — apply a plastic restorer or UV protectant every 2-3 months to maintain the matte black finish
- Wax barrier: apply a coat of wax to the body panel underneath and immediately around the flare edge — this prevents moisture from bonding dirt to the paint in the flare-to-body gap
If you live in a salt belt state, pull the flares off once a year (spring is ideal) and inspect the paint underneath. Salt spray gets trapped between the flare and the body panel and accelerates rust. Wash the hidden surface, touch up any chips, and reapply a protective wax layer before remounting.
Textured plastic flares can be restored when they fade using a heat gun on low setting or a dedicated trim restorer like Cerakote Trim Coat. Painted flares should be treated like any other painted body panel — wash, clay bar if needed, and wax. If your painted flares start peeling, the factory clear coat is failing and they'll need to be sanded and resprayed.
Troubleshooting Common Installation Problems
Even straightforward installs can hit snags. Here are the most common issues and how to fix them without starting over.
- Clips won't seat into factory holes: factory holes often have paint or undercoating buildup — ream them out with a drill bit one size larger than the clip shank, then retry
- Adhesive tape won't stick: the surface wasn't properly degreased, or the temperature is too low — remove the flare, clean with rubbing alcohol, apply new 3M automotive tape, and reinstall above 60°F
- Flares rattle at highway speed: vibration means a loose mounting point — add a rubber washer behind the loose clip or bolt for extra tension, or apply a small bead of silicone between the flare and the body at the rattle point
- Drill hole in the wrong spot: fill the misplaced hole with a body plug or rivet nut, seal with touch-up paint, and redrill in the correct position
- Rear flare doesn't match bed line: many trucks have a slight offset between the cab and bed — use the flare's slotted mounting holes to shift it until the visual line looks correct from 10 feet away
- Water leaking behind flares: the rubber gasket or foam seal isn't making full contact — apply a thin bead of clear silicone sealant along the top edge of the flare where water entry is visible
If your flares came with a rubber edge trim that runs along the bottom, make sure it's pushed fully into the channel. A loose rubber lip catches wind at speed and creates a whistling noise that sounds like a window seal problem. Trim it flush with the flare end if it's too long.
When all else fails, contact the manufacturer's support line. Most reputable flare brands offer lifetime warranties on hardware and will ship replacement clips, bolts, and gaskets at no cost. Keep your purchase receipt and order confirmation email accessible for warranty claims.
Related Articles
- Best Truck Headlight Bulbs — Referenced during truck prep — readers doing exterior upgrades may also want to replace headlight bulbs in the same session
- Best Tonneau Covers for Trucks — Relevant when discussing rear flare fitment near the truck bed and potential interference with bed accessories
- How to Install a Tonneau Cover: Complete Step-by-Step Guide — Referenced when aligning rear flares around bed-mounted accessories like tonneau covers
Conclusion
Frequently Asked Questions
How long does it take to install fender flares?
Can you install fender flares without drilling?
Do fender flares damage your truck's paint?
Do you need fender flares for bigger tires?
What is the difference between OE-style and pocket-style fender flares?
How do you prevent fender flares from fading?
Can you paint fender flares to match your truck?
Do fender flares affect gas mileage?
Affiliate Disclosure: This article contains affiliate links. If you purchase through these links, we may earn a commission at no extra cost to you.